Two great D.I.O projects...
Make Your Own Valance by Nate Berkus
Get the step-by-step guide to making your own affordable valance, even if you don't sew!
Get the step-by-step guide to making your own affordable valance, even if you don't sew!
What You Need
Wooden Valance
Staple Gun
Batting
Scissors
Fabric
Masking Tape
Acrylic Paint
Stencil brush
Wooden Valance
Staple Gun
Batting
Scissors
Fabric

Masking Tape
Acrylic Paint
Stencil brush
Directions

1. Purchase a wooden valance at your local hardware store. Measure the height and length of the valance. When measuring the length, include measurements for the sides as well as the face
2. Add two inches to each of these measurements, and cut batting to these measurements.
3.Wrap the batting around the valance. Using a heavy duty STAPLE GUN, attach batting to valance at the back side. Begin stapling at the center and work toward the ends. At the ends, it may be necessary to trim away some of the bulk created when folding and stapling the batting.

4. Add an inch to your batting measurements to the measurements of your fabric. Cut the fabric to size.

5. Staple the fabric to the valance in much the same way the batting was attached. Gently pull the fabric tight as you work. Turn your work over regularly to make sure there are no creases or puckers.

6. At the fabric ends, create neat "hospital" style corners and staple in place.

7. To create a design or stripe on the fabric valance, layout your pattern using masking tape. Remember that it is the blank area between the lengths of tape which will make up your design. When you are satisfied with the design, make sure that the edges of the tape are smooth and adhered without gaps to the fabric. In the demonstration, the blue tape represents the area that will be painted, and the white tape is the temporary stencil for the pattern.

8. Use artists' acrylic paint because it's thick and has less tendency to "bleed" under the tape. Dip the stencil brush into the paint. Dab off excess paint, and cover the stenciled area. It is best to apply the first coat of paint very lightly. Be careful not to drip paint on other exposed areas of the valance.
9. After you've completed painting, allow at least an hour dry time. Repeat for a second coat. It may be necessary to apply a third coat.
10. Allow paint to dry entirely before removing the masking tape.
Easy Pelmet Boxes by http://littlegreennotebook.blogspot.com/2009/09/easy-pelmet-boxes.html
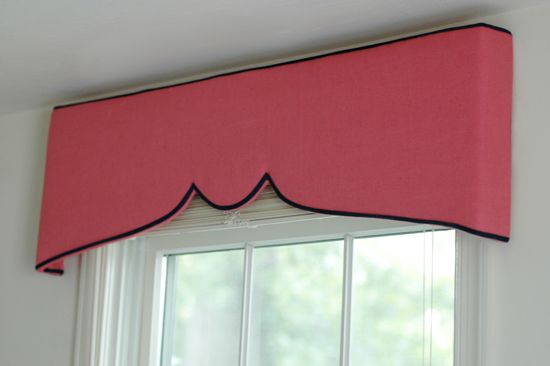
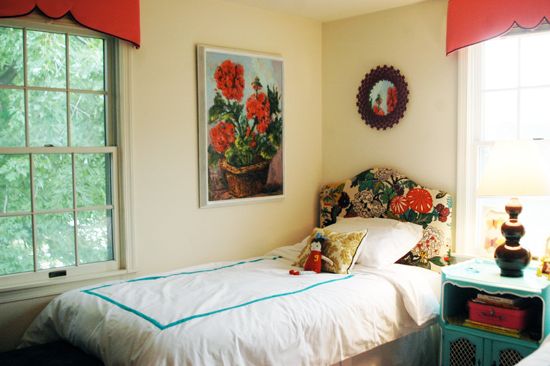
Many of you asked about the pink pelmet boxes in my girls' room and I’ve been so excited to share the mini-tutorial! It’s an easy and inexpensive one!

Two of the three windows in the bedroom were obstructed by furniture, so curtain panels (my default window treatment) weren’t really an option. I thought about transforming the mini-blinds into fabric shades, but I was really hoping to find a way to make a structured valence or pelmet box.

In the early planning stages, I was going to buy some plywood at Home Depot and use an electrical saw to cut out a fun design. That was intimidating for me though, and the price of the wood and a new saw (or a carpenter) was going to add up. Then I realized that I didn’t need anything fancy in this room – just something flat that could be cut easily and that was sturdy enough to hold up some batting and fabric.
Enter: foam core board.
I picked up three sheets at Michael’s for $1.99 each. I carefully drew one half of my pelmet shape on to the foam core, cut it out with a box cutter and used that piece as my template. I also cut some short pieces that would be my sides.

I had bought some L-brackets, screws, nuts and washers to assemble the corner pieces, but I ended up just duct taping the whole thing!! This project was SO easy!!

Two of the three windows in the bedroom were obstructed by furniture, so curtain panels (my default window treatment) weren’t really an option. I thought about transforming the mini-blinds into fabric shades, but I was really hoping to find a way to make a structured valence or pelmet box.

In the early planning stages, I was going to buy some plywood at Home Depot and use an electrical saw to cut out a fun design. That was intimidating for me though, and the price of the wood and a new saw (or a carpenter) was going to add up. Then I realized that I didn’t need anything fancy in this room – just something flat that could be cut easily and that was sturdy enough to hold up some batting and fabric.
Enter: foam core board.
I picked up three sheets at Michael’s for $1.99 each. I carefully drew one half of my pelmet shape on to the foam core, cut it out with a box cutter and used that piece as my template. I also cut some short pieces that would be my sides.

I had bought some L-brackets, screws, nuts and washers to assemble the corner pieces, but I ended up just duct taping the whole thing!! This project was SO easy!!
Then, using ¼” staples and my trusty PowerShot Pro, I upholstered the pelmets with some batting and pink linen left over from a client’s project. I ended up using only about a yard of fabric for all three pelmets.
After stapling, I used Fabri-tac to glue on ¼” navy blue bias tape as a top and bottom border.
I don’t have a photo of this step, but to hang the pelmets, I simply epoxied some wall hangers to the back of the foam core, and hung the boxes on the walls with nails.

And that’s it! It took me about two hours to do this project - from design conception to hanging the three pelmets. So fast and so easy!

I don’t have a photo of this step, but to hang the pelmets, I simply epoxied some wall hangers to the back of the foam core, and hung the boxes on the walls with nails.

And that’s it! It took me about two hours to do this project - from design conception to hanging the three pelmets. So fast and so easy!


so. so cute!! I want to be living in a place where I can do this!
ReplyDeletexoxo em